

What Is KALI LINUX ?
Kali Linux is a Debian-based Linux distribution aimed at advanced Penetration Testing and Security Auditing. Kali contains several hundred tools aimed at various information security tasks, such as Penetration Testing, Forensics and Reverse Engineering. Kali Linux is developed, funded and maintained by Offensive Security, a leading information security training company.
Kali Linux was released on the 13th March, 2013 as a complete, top-to-bottom rebuild of BackTrack Linux, adhering completely to Debian development standards.
Kali Linux Hard Disk Install
Kali Linux Installation Requirements -
Installing Kali Linux on your computer is an easy process. First, you’ll need compatible computer hardware. Kali is supported on i386, amd64, and ARM (both armel and armhf) platforms. The hardware requirements are minimal as listed below, although better hardware will naturally provide better performance. To download official image Click here-> “ Download Kali Linux ” and burn the ISO to DVD.
Installation Prerequisites -
• A minimum of 10 GB disk space for the Kali Linux install.
• For i386 and amd64 architectures, a minimum of 512MB RAM.
• CD-DVD Drive / USB boot support
Preparing For The Installation -
2} Burn The Kali Linux ISO to DVD.
3} Ensure that your computer is set to boot from CD / USB in your BIOS.
Kali Linux Installation Procedure -
1] To start your installation, boot with your chosen installation medium. You should be greeted with the Kali Boot screen. Choose either Graphical or Text-Mode install. In this example, we chose a GUI install.

2] Select your preferred language and then your country location. You’ll also be prompted to configure your keyboard with the appropriate keymap.

3] Specify your geographic location.

4] The installer will copy the image to your hard disk, probe your network interfaces, and then prompt you to enter a hostname for your system. In the example below, we’ve entered “kali” as my hostname.

5] You may optionally provide a default domain name for this system to use.

6] Next, provide a full name for a non-root user for the system.

7] A default user ID will be created, based on the full name you provided. You can change this if you like.

8] Next, set your time zone.

9] The installer will now probe your disks and offer you four choices. In our example, we’re using the entire disk on our computer and not configuring LVM (logical volume manager). Experienced users can use the “Manual” partitioning method for more granular configuration options.

10] Select the disk to be partitioned.

11] Depending on your needs, you can choose to keep all your files in a single partition — the default — or to have separate partitions for one or more of the top-level directories. If you’re not sure which you want, you want “All files in one partition”.

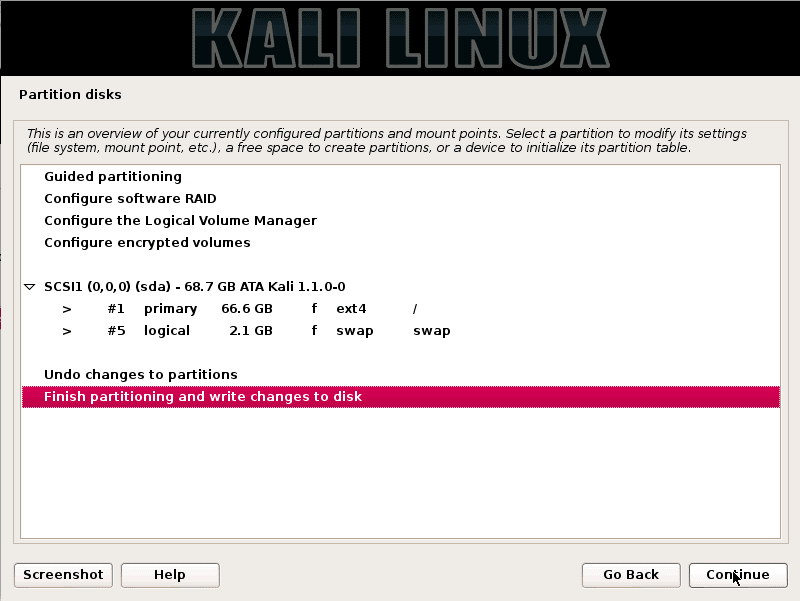
12] Next, you’ll have one last chance to review your disk configuration before the installer makes irreversible changes. After you click Continue, the installer will go to work and you’ll have an almost finished installation.
13] Configure network mirrors. Kali uses a central repository to distribute applications. You’ll need to enter any appropriate proxy information as needed.

NOTE! If you select “NO” in this screen, you will NOT be able to install packages from Kali repositories.
14] Next, install GRUB.

15] Finally, click Continue to reboot into your new Kali installation.

So Yup ; that's it. Now that you’ve completed installing Kali Linux, it’s time to customize your system.
NOTE : Above Article Is For Educational Purposes only ; if you cause any damage to your computer , we'll not be responsible.
Join Our Facebook Group for More Innovative Articles.
Also , do LIKE Our Facebook Page & Follow Us.
For Instant Alerts ; Join Our WhatsApp Broadcasts . Just Send "SUB (YOUR NAME) To 7700077433.
And Don't Forget To SHARE It With Your Friends......THANK YA GUYS =D
》》CAUSE WE WORKED ALL NIGHT FOR THE BEST POST EVER ;D
